


DIY Car Care: How to Use Automotive Evaporator Cleaner Like a Pro
Keeping your car’s air conditioning system clean is one of the most underrated maintenance tasks. Over time, dirt, mold, and mildew can build up inside your evaporator, leading to unpleasant smells, reduced cooling performance, and even health issues. That’s where using an automotive evaporator cleaner comes in handy. It’s a simple, cost-effective way to keep your AC system fresh and clean, especially when you take the DIY approach. Let’s walk through how to use this cleaner like a pro and keep your car's air as clean as possible.
Why You Need to Clean Your Evaporator
Before diving into the "how," it’s important to understand the "why." Your car's AC evaporator is a magnet for dirt, dust, and moisture, all of which can create the perfect breeding ground for mold and bacteria. When these contaminants build up, they can produce a musty odor that fills your car every time you turn on the AC. Beyond the smell, dirty evaporators can reduce the efficiency of your system, making your car take longer to cool down on hot days. Regular cleaning with an automotive evaporator cleaner can solve these issues and improve the air quality in your vehicle.
Step-by-Step Guide to Using Automotive Evaporator Cleaner
-
Gather Your Supplies
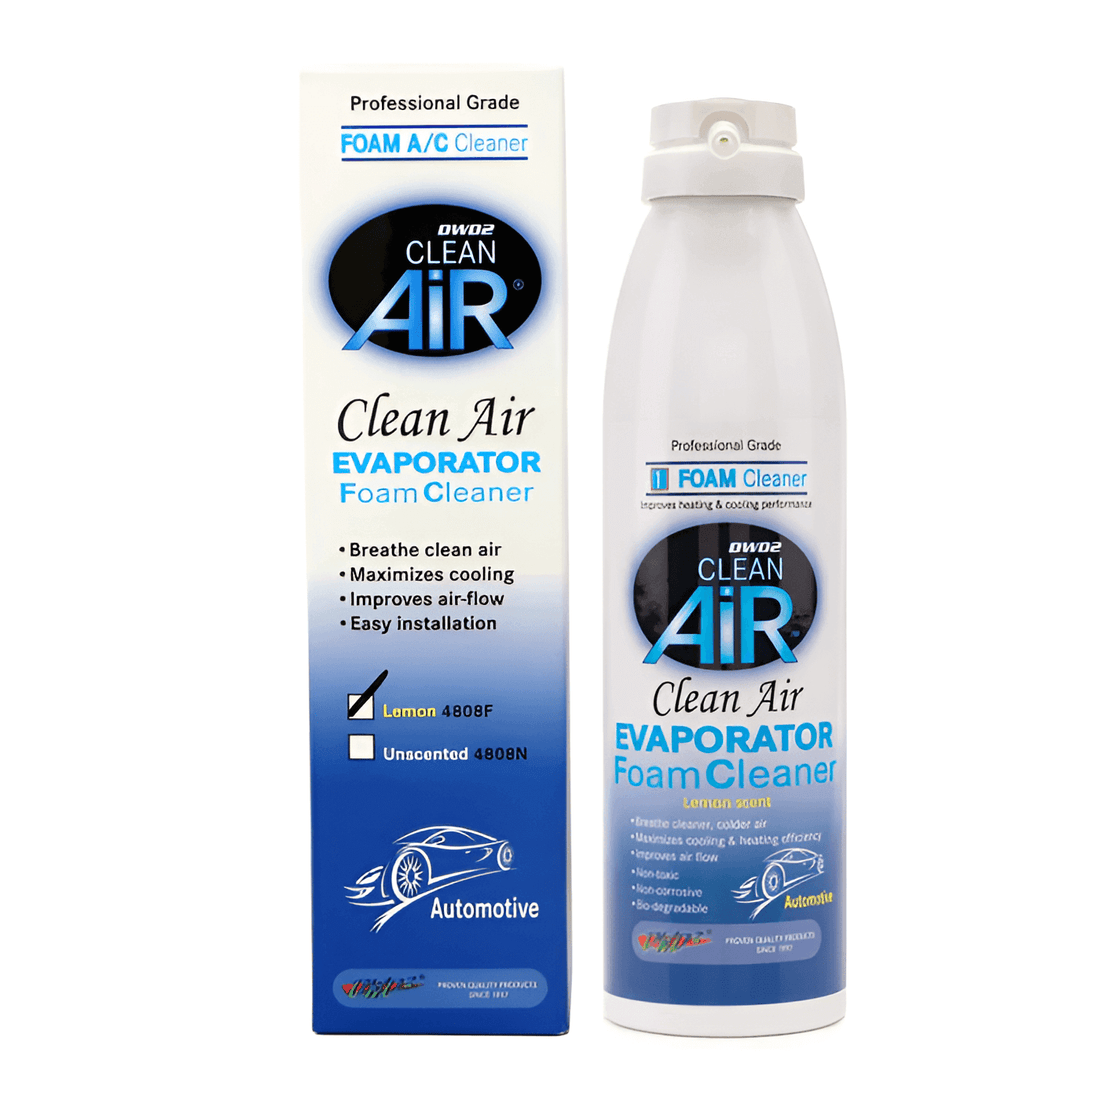
Before you get started, make sure you have everything you need. A good automotive evaporator cleaner is the most important item on the list. Look for one that is non-toxic, biodegradable, and designed to penetrate deep into the evaporator, like the DWD2 Clean Air foam. Grab a screwdriver (to access the AC system), a flashlight (to check for buildup), and some paper towels or rags to clean up any drips.
-
Locate the AC Drain Hose
Your car’s AC system has a drain hose that allows condensation to escape. This is where you'll apply the cleaner. The drain hose is typically located under the vehicle near the passenger side. If you’re unsure where to find it, consult your car’s manual or look for tutorials online that show the location for your specific make and model.
-
Apply the Automotive Evaporator Cleaner
Once you’ve located the drain hose, it’s time to apply the cleaner. Follow the instructions on the product carefully. Most automotive evaporator cleaners come in aerosol form with a long nozzle attachment, making it easy to spray the product directly into the drain. Insert the nozzle into the hose, and spray the cleaner for the recommended amount of time (usually about 30 seconds to 1 minute).
The foam cleaner will expand inside the evaporator, penetrating every nook and cranny to break down dirt, mold, and mildew. After a few minutes, it will liquefy and drain out through the hose, taking the contaminants with it.
There are five primary techniques for applying an evaporator cleaner to your vehicle's evaporator:
-
Through the Evaporator Drain
The most commonly used method is to administer the cleaner through the evaporator drain located underneath the vehicle. However, this approach necessitates raising the vehicle to a sufficient height to access the evaporator drain, which can be inconvenient and pose a safety risk if the proper equipment is not available.
-
Drilling a Hole Near the Blower Fan
The second method entails drilling a small hole between the blower fan and the vehicle's evaporator, typically performed inside the vehicle under the dashboard on the passenger side. This method is highly recommended as it enables the fan to propel the foam deep into the evaporator fins, resulting in a more thorough cleaning. However, it does require the use of a drill and comfort with this type of application.
-
Accessing Through the Cabin Air Filter Opening
The third method involves accessing the evaporator through the cabin air filter opening. With this method, you would need to remove the cabin air filter and insert the tube of the cleaning product through the opening toward the driver’s side, reaching as far as possible to apply the cleaner. The downside to this method is that its feasibility is contingent on the vehicle's design, as not all vehicle evaporators can be accessed in this manner.
-
Let the Cleaner Work Its Magic
Patience is key. Once you’ve applied the cleaner, let it sit for about 15 to 20 minutes. This will give it time to dissolve all the buildup inside your evaporator. During this time, check for any leaks or drips under the car and clean them up with your paper towels or rags.
-
Rinse and Repeat (If Necessary)
After the cleaner has had time to do its job, start your car and run the AC on high for about 10 minutes to flush out any remaining cleaner. You should notice an immediate improvement in the smell and performance of your AC. If you still detect odors or feel like the system hasn’t fully cleared, you can repeat the process for a more thorough cleaning.
Pro Tips for the Best Results
-
Clean the Air Filters: While you’re focusing on your AC system, don’t forget to check your cabin air filters. A clogged filter can also contribute to poor air quality and reduce the efficiency of your AC. Cleaning or replacing the filter regularly will complement the use of an automotive evaporator cleaner and ensure your system is working at peak performance.
-
Perform Regular Maintenance: To keep your evaporator clean and avoid future buildup, use an automotive evaporator cleaner every few months, especially if you live in a humid climate. The extra moisture in the air can accelerate mold growth, so frequent cleaning is essential.
-
Watch Out for Warning Signs: If you notice a persistent musty smell, reduced airflow, or longer cooling times even after cleaning, it might be time to have your AC system checked by a professional. A more serious issue could be, such as a clogged evaporator or a malfunctioning component.
Why DIY Evaporator Cleaning Matters
Taking care of your car’s AC system isn’t just about comfort; it’s about your health and the longevity of your vehicle. Dirty evaporators can circulate allergens, mold spores, and other harmful particles through your car's interior, which can cause respiratory problems for you and your passengers. By learning how to use an automotive evaporator cleaner properly, you’re saving money on professional cleanings and taking control of your car’s air quality.
Conclusion
Cleaning your car’s AC evaporator might sound intimidating, but with the right tools and a bit of know-how, it’s a task you can easily handle at home. Using a high-quality automotive evaporator cleaner like the ones from DWD2, you can keep your car’s AC system running smoothly and ensure you and your passengers breathe clean, fresh air. Regular maintenance, a little effort, and attention to detail will make a difference in your car care routine. Give it a try—you might be surprised at just how easy and effective it can be!